Bridging to Solana
The current cryptosphere is made up of numerous blockchains which can act as silos for assets and liquidity. With that in mind, cross-chain mobility for crypto assets is a highly desirable solution in this realm. To solve this issue, bridges were invented. Bridges are applications configured to manage asset custody and enable cross-chain asset swapping.
Most bridge applications work in the same way. They require connecting multiple wallets (source & destination chains), selecting the input / output tokens, and the input amount. They will also require at least 2 transactions confirming on both the source and destination chains.
Basic Bridging User Flow
- Start on the bridge application you intend to use.
- Next, connect your source wallet that will be funding the bridging transaction.
- Select the source token and input the amount that you want to use in the bridging transaction.
- Connect the destination wallet that will be receiving the funds from the bridging transaction.
- Select the token that you would like to bridge into on the destination chain.
- Review the transaction preview to understand the total fees that the transaction will require.
- Approve the bridge transactions. There will be two: one for the source chain and another for the destination chain.
USDC - CCTP
Try it out here!
The Cross-Chain Transfer Protocol (CCTP) is a permissionless on-chain utility that ensures secure USDC transfers between blockchains using a native burn-and-mint process. This bridge is powered by Wormhole and Circle.
USDC Bridge UI

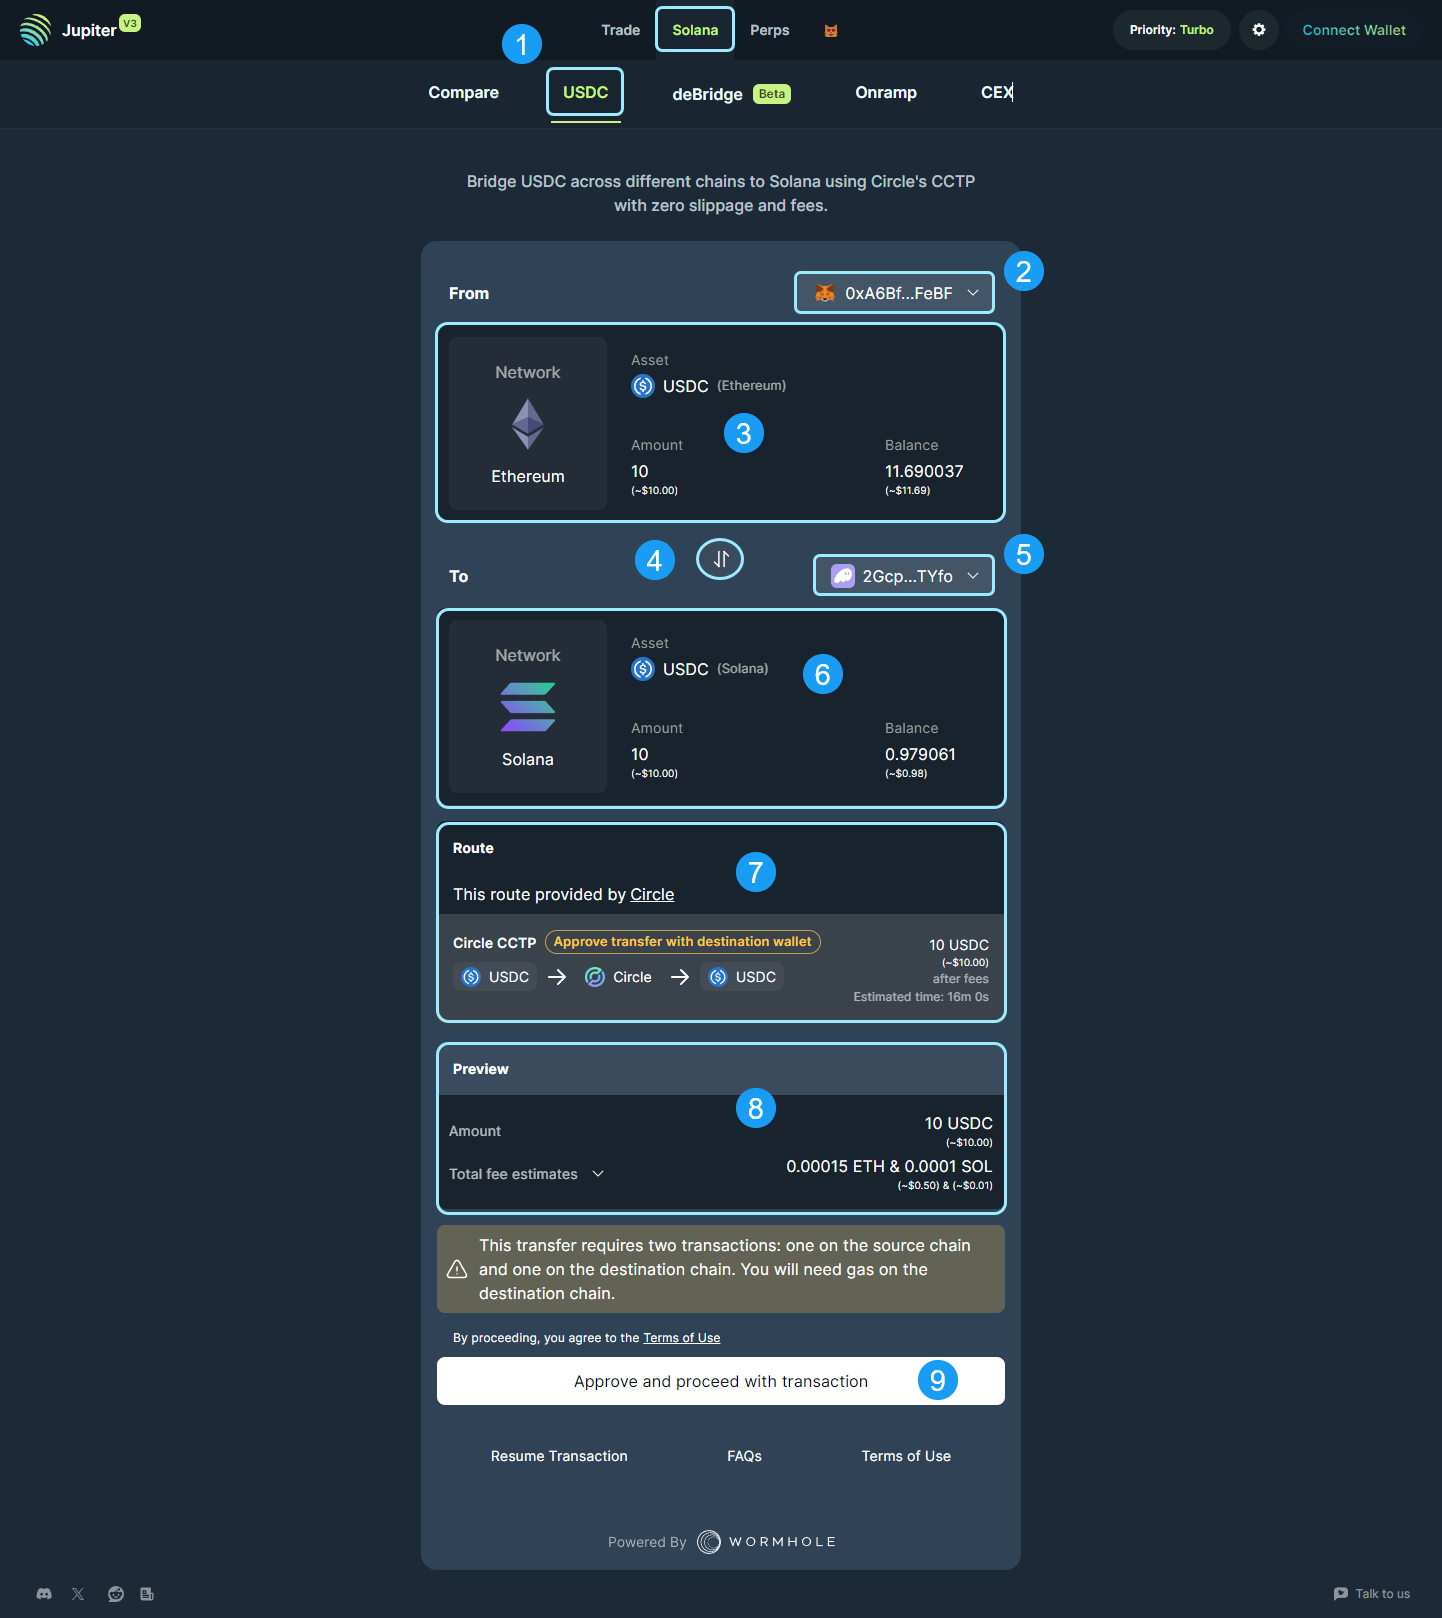
- USDC Bridge Selector: Application selector to navigate to the USDC bridging tool.
- Source Wallet Connect: Connect the wallet associated with the source blockchain you are looking to bridge from.
- Asset Selector & Amount Field: Select the token from the source wallet and enter the amount of the token you would like to bridge.
- Destination / Source Switching Tab: This will allow you to switch destination and source chains and tokens respectively.
- Destination Wallet Connector: Connect the wallet associated with the destination blockchain you are looking to bridge to.
- Asset Selector & Amount Field: Select the token on the destination blockchain you want to bridge to. The amount field is auto-calculated based on market rates and is non-editable.
- Route: The best route is determined by the application and displayed here for you to review.
- Preview: The bridging transaction preview will build here, identifying the Amount that will be received and the total fee estimates for the transaction. Note: There will be fees on both the source and destination blockchains as you have to execute transactions on both.
- Approve and Proceed with Transaction: Once you have reviewed the Route and the Preview, click here to start the bridging process.
deBridge
Try it out here!
deBridge is a cross-chain interoperability and liquidity transfer protocol that allows decentralized transfer of data and assets between various blockchains.
deBridge UI

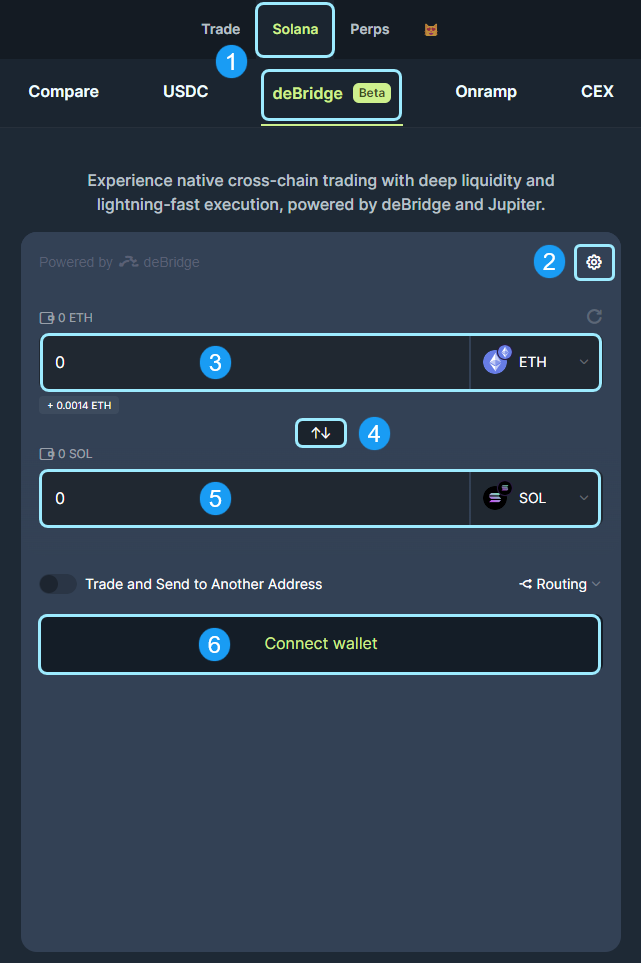
- deBridge Selector: Application selector to navigate to the deBridge tool.
- Settings: Source chain settings can be modified here, including gas fee, node selection, and other settings native to the source blockchain.
- Source Chain & Token Selector: Select the token from the source wallet and input the amount of the token you are looking to bridge.
- Destination / Source Switching Tab: This will allow you to switch destination and source chains and assets.
- Destination Chain & Token Selector: Select the token in the destination wallet to bridge into. The amount field will auto-calculate for you based on exchange rates of the bridging route.
- Connect Wallet: This button allows you to connect your source wallet to begin the bridging process. Once you connect, the UI will update and it will auto-detect the wallet balances and populate the UI.
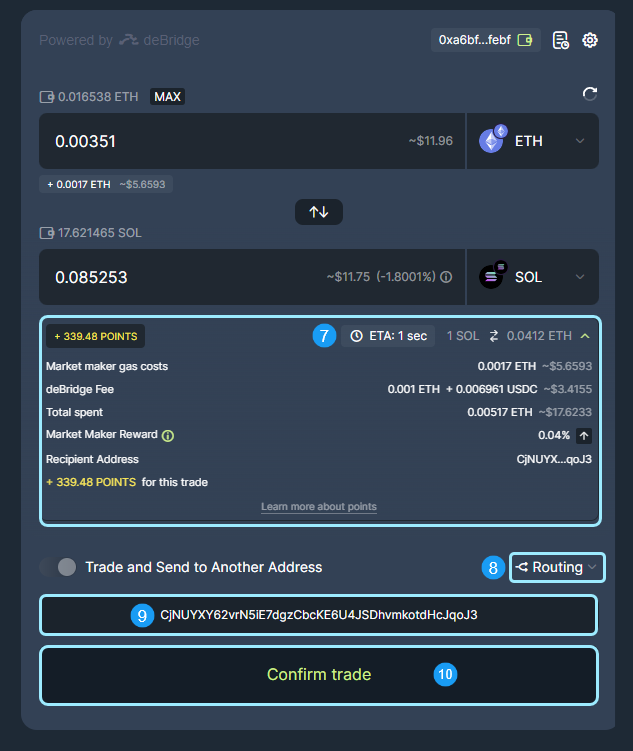
Part two continues below, with the updated interface after connecting your wallet.

- Transaction ETA & Fee Breakdown: Here you can review the fees on each blockchain as well as the bridging fee and destination address.
- Routing: Expandable routing display to review the entire bridge route for the simulated transaction.
- Destination Wallet Address: If displayed, enter your destination wallet address here.
- Confirm Trade: After reviewing the route, fees, and token inputs, click this button to confirm the trade and begin the bridging transactions.